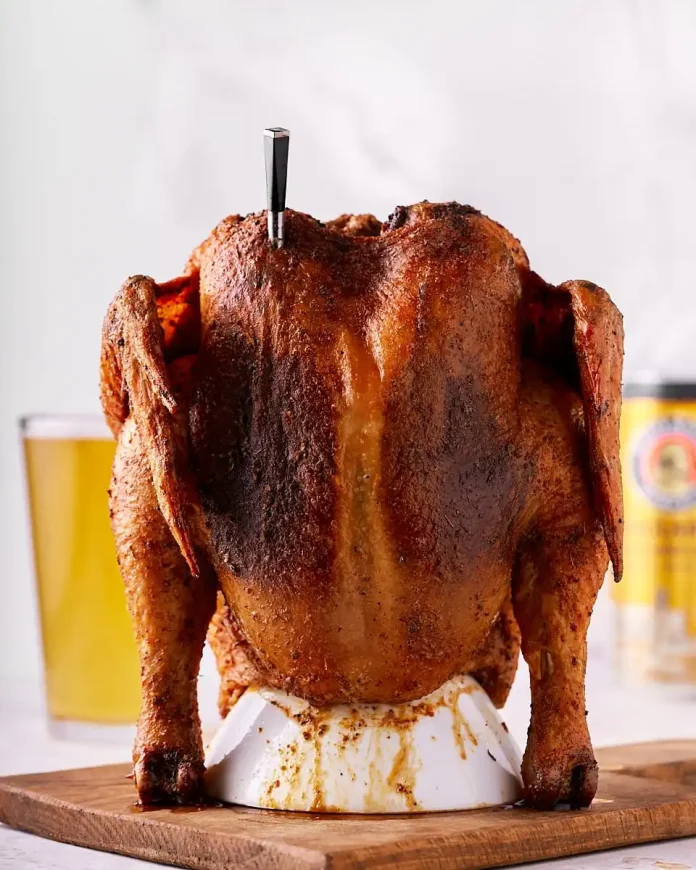
There’s nothing quite like a juicy and flavorful chicken fresh off the grill, and one of the best ways to achieve that is by cooking it with beer! That’s right, beer can chicken is a popular method of cooking a whole chicken that involves propping it up on a partially filled can of beer and grilling it to perfection. Not only does the beer add moisture and flavor to the chicken, but it also creates a crispy skin that’s sure to impress your taste buds. In this recipe, we’ll show you how to make your own Beer Can Chicken, step-by-step, so you can enjoy a delicious and satisfying meal with family and friends. So grab a can of your favorite beer and let’s get started!
What is beer can chicken?
Beer can chicken is a method of cooking a whole chicken by placing it vertically on top of a partially filled can of beer and grilling or roasting it.
Why use the beer can chicken method?
The beer can chicken method helps to keep the chicken moist while cooking and infuses it with flavor from the beer and any other seasonings used.
Do I need a special beer can for beer can chicken?
No, any standard 12-ounce can of beer will work for beer can chicken. I do find a 16-ounce beer can works better for larger chickens, though. Some companies do sell special beer can chicken holders or racks that work well.
Can I use something other than beer?
Yes, you can use other liquids such as soda, broth, or wine in place of beer for beer can chicken. Feel free to experiment by adding different herbs as well.
How long does beer can chicken take to cook?
Cooking time will vary depending on the size of the chicken and the cooking method used. Generally, it takes 1-2 hours to cook a whole beer can chicken on a grill or smoker.
Can I cook beer can chicken in the oven instead of on a grill?
Yes, you can cook beer can chicken in the oven by placing it on a baking sheet or roasting pan and cooking it at 350°F (175°C) until it reaches an internal temperature of 165°F (74°C).
Ingredients
Beer Can Chicken
- 4 pounds whole chicken, preferably air chilled
- 1/2 can of beer, preferably lager
- 1 tablespoon olive oil, substitute any other vegetable oil
Dry Rub
- 1 tablespoon salt
- 3 teaspoons dried Italian seasoning
- 2 teaspoons garlic powder
- 2 teaspoons paprika, preferably smoked
- 1 teaspoon dry ground mustard
- 1 teaspoon brown sugar, substitute coconut sugar
- 1/2 teaspoon black pepper
- 1/2 teaspoon onion powder
- 1/4 teaspoon cayenne pepper, optional
Grilling Tools
- 1 MEATER Plus Bluetooth Thermometer, optional but recommended
- 1 ThermoPro Instant Read Thermometer, optional
Steps
1. Preheat the grill or smoker
Preheat grill or smoker to 350°F according to the manufacturer’s instructions.
2. Make the chicken rub
In a medium sized bowl, mix together all of the dry rub ingredients.
3. Prep the chicken
Remove giblets from chicken and pat dry with paper towels. Separate the skin from the breasts with your fingers being careful not to tear the skin. Spread the olive oil evenly over all of the chicken breasts, and then apply an even layer of the seasoning mixture over and under the skin.
Set the chicken on top of the beer leaving 1-2 inches of the can sticking out of the chicken. This will allow it to stand up easier. Optionally, stand the chicken in a shallow cast iron skillet or pan to help it from tipping over on the grates.
4. Cook the beer can chicken
Place the chicken breasts in the grill and cook until they reach an internal temperature of 160°F in the thickest part of the breast, approximately 1-1 1/2 hours depending on the size of the chicken. The chicken will continue to cook once removed from the grill and eventually reach a final temperature of 165℉.
I recommend using an internal meat thermometer to easily keep track of the temperature. Remember, always cook to temperature and not time!
5. Rest the beer can chicken
Remove the can of beer from inside the chicken and transfer the chicken to a carving board. Discard the remaining beer. Let the chicken rest for 10-20 minutes. This will allow the juices to redistribute back into the meat and not run out when slicing.
6. Serve the beer can chicken
Once the chicken has rested for 10-20 minutes it’s ready to serve. Carve and enjoy!


